
As of yesterday's Summer Solstice, it is official that summer is really here.

The hot humid hazy weather has arrived and I put the two window AC units on at 6pm when I JUST COULD NOT STAND IT any longer! UGH I hate summer. Bugs dirt sand pollen heat humidity and all your food spoils so dang fast. I love winter! Make it snow.

 I lifted up one half of the end of the thick batting to be able to spray baste the backside of the backing fabric with the June Taylor Basting Spray and smooth it and pat it into place. Then I did the other half.
 Next, I trimmed off the excess backing fabric with scissors at approximately 48" which had been the width of the roll of batting. The fabric had been approximately 41" wide.
 Now I was ready to try it. Off to the Quilt Cave!
First, I was a little disappointed to find that the strips in the scrap bag were NOT full width of fabric, so I needed to splice them together. I started at the short end of the right hand side and attached my first strip by placing it face down and offset to the very edge by about half an inch.
 I stitched through all three layers to attach that first piece, and then flipped it over the stitching to have it facing right side up. I smoothed it flat with my hands and joined the next strip, face down on top of the first. Then I just kept adding more strips in the same way.
 This is very similar to sewing string blocks onto a cloth foundation but you do need to spend a lot of time smoothing and fluffing. I only stitched about 6 inches at a time and then stopped and smoothed and fluffed the awkward backing/batting piece before continuing on the next 6 inches.
 Each strip I added created a new vertical channel of quilted fabric. Notice that I am working from right to left here, with the blank batting to my left.
 As I worked along, I rolled the already-quilted right hand side up and kept smoothing as I stitched. I found the unwashed fabric strips to be a little slippery to hold onto, so I used some rubberized cotton garden gloves that I had gotten at Walmart for $5. Be sure to pick up a pair while they are in season because they pack them away in warehouses after summer. Ask me how I know!
 After I had progressed about halfway across the backing/batting piece, I switched it around and sewed down the other direction. Notice that in the above photograph, the white field is to my right now. I just kept stitching those strips down for an hour and then took a break and came back for another hour. It's easy but it takes time!
 The last strip was this burnt orange floral and it got sewn twice; once here (above) from the wrong side, then again on the top of the right side to secure it to the end-edge (below).
 It looked pretty good front and back, only a tiny pucker in the backing, not worth bothering about. It wouldn't have happened at all if I had ironed out the backing folds. I'll know next time not to be quite so slovenly, LOL!

Then I raced up to the driveway again to trim the edges as evenly as I could with scissors.

The top and bottom edges are definitely a little wonky but the overall effect is charming. I just love it!
There is only a little pile of slivers for waste.
 Here is what the fabrics look like:
 This will be fun to share with The Sunshine Girls who did meet on Friday. Here is Pauline admiring Sue's Le Moyne Star at The Alton senior Center in New Hampshire.
 Norma was pressing her hand piecing I think.
 And on Kitty Patrol:
My Matthew was arguing with me that the kittens are not still nursing on Spooky. I beg to differ! This was taken yesterday and shows all four kittens suckling. You can't see the fourth head hidden under Spooky's leg. What a great Mom she is!
 Happy sewing!

The hot humid hazy weather has arrived and I put the two window AC units on at 6pm when I JUST COULD NOT STAND IT any longer! UGH I hate summer. Bugs dirt sand pollen heat humidity and all your food spoils so dang fast. I love winter! Make it snow.
I was delighted to hide downstairs in my Quilt Cave where it is so cooler. I decided to play with one of my late-at-night Ebay purchases for around $15 counting postage. Here it is; a Moda Scrap Bag of "Cattails and Clover" by Kansas Troubles, full of selvedged trimmings from where they made pre-cuts to sell.

I wanted to make a Quilt-As-You-Go strippy quilt. I'd never tried it before so this was new to me. I had a two yard hunk of the gold/brown print to use as the backing and I spread it out right side down on my driveway. Then I laid out some leftover high loft polyester Mountain Mist that I've had stored in my attic for at least 10 years and cut it to size.


First, I was a little disappointed to find that the strips in the scrap bag were NOT full width of fabric, so I needed to splice them together. I started at the short end of the right hand side and attached my first strip by placing it face down and offset to the very edge by about half an inch.


Then I raced up to the driveway again to trim the edges as evenly as I could with scissors.
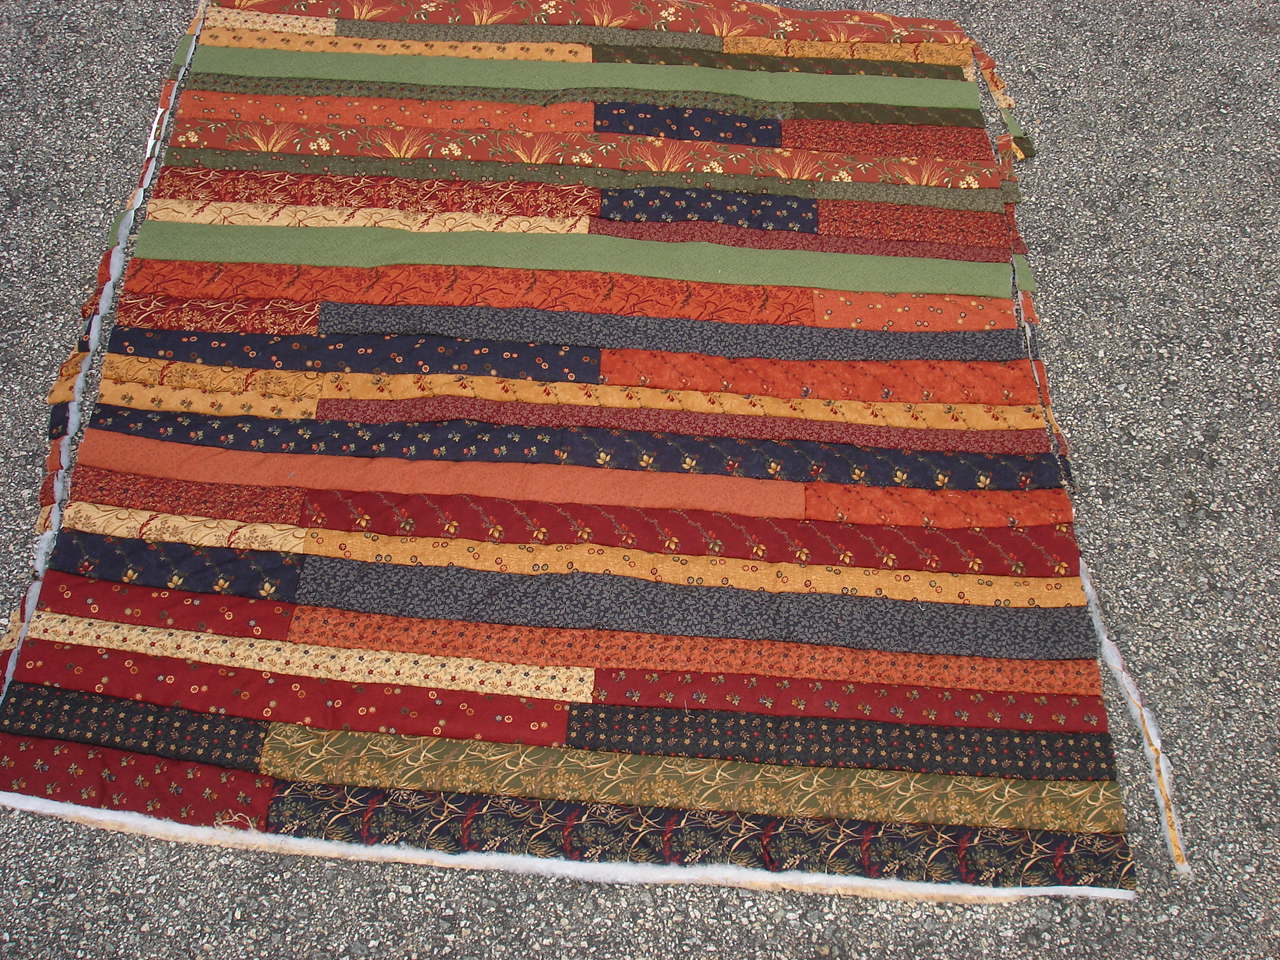
The top and bottom edges are definitely a little wonky but the overall effect is charming. I just love it!
There is only a little pile of slivers for waste.


My Matthew was arguing with me that the kittens are not still nursing on Spooky. I beg to differ! This was taken yesterday and shows all four kittens suckling. You can't see the fourth head hidden under Spooky's leg. What a great Mom she is!


5 comments:
That was a bargain on those KT scraps! I've never done a quilt-as-you-go.
I Love Kansas Troubles fabrics! I hoard it. My bad! I've never done a quilt as you go either, thanks for the tutorial. Oh, I tried that tip of ironing freezer paper onto the back of a label, works fabulous!.......Momma looks very content with her babies.
I discovered your blog this morning during my blog hopping and I must say..I love strippy quilts and this one is so pretty with the fabrics used!!
Thanks for the tutorial! Is there a story about your White sewing machine? (Shades of Bonnie H...)
Thank you for sharing your blog! It's lovely to see what happens to the scrap bags after they leave my sewing room! The quilt as you go is a great idea, I have never done it but will definitely try it one of these days.
Tuija
Post a Comment