Tuesday, July 31, 2012

Picket Lines

Over on Stashbuster's I saw a quilt in this week's album that really inspired me. It was called Picket Fence and I was just itching to try it! After ruminating on it for a day or so, I remembered a gallon baggie that I've hoarded since October 2011. It was a swap of bonus strips that were all 2 1/2" wide, cut half width of fabric, with no particular theme or color. So I had 100 of these!
I sorted out the lights and the mediums and only worked with the darks. I cut the dark strips into 2 1/2" X 4 1/2" bricks. Then, remember those creamy neutrals that I had made into a home made jelly roll for my guild's Penny Sale? Well, I had cut a few extras for myself, too. So I used those as my lights, cutting those also into 2 1/2" X 4 1/2" bricks. Armed with light and dark identical bricks, I was ready to start to play!
You take a light and a dark and lap the ends at a right angle, right sides together, as if you were joining binding strips on the bias.
I sewed through on the diagonal by getting it started at the first corner, then placing my index finger on the end point corner, so that I could see where I was aiming. As Bonnie Hunter would say, "Aim and shoot!"
I finger-pressed the units to the dark side. The large 12 1/2" block is made up of four quadrants that are 6 1/2" unfinished but will finish at 6" in the quilt. For each quadrant, you need two light/dark units, and one dark/dark unit, for a total of three units making up one single quadrant.
It is very important to make the units all the same way.
I had such fun making these and then joining four together to make the center star "pop"!
I got two made, here is the second one:
It doesn't show in these pictures, but as I worked on the singleton units, I DID take the time to sew the extra seam to make bonus triangle squares, a la Bonnie K. Hunter. Someday, Ocean Waves!


Sunday, July 29, 2012

Flaxen Strands

Yesterday, I braved the terrible heat and humidity to attend a flax dressing historical demonstration that was held right here in Gilmanton. It was hosted by the Gilmanton Historical Society, and the presenter was Gina Gerhard of 752 Murray Hill Road in the town of Hill, New Hampshire. It was a fun outing and a divergence from all my cotton quilting fabric to learn about colonial processing of flax.
We were lucky that the rain held off until the night.


Everybody gifts me those calendar-printed linen dish towels each Christmas and I never appreciated how much trouble colonial women had to go through to make such an item.


Check out that flaxen wig in the upper photograph! Imagine that.
Sorry the above photo is rather dark, but off to the right were two women spinning flax on spinning wheels. On a third spinning wheel, wool was being spun for linsey-woolsy.
It was a very enjoyable presentation and if you would like your own guild or group to inquire about having Gina Gerhard give her talk at your event, her email address is dyednwool@aol.com.

Raven did not go because she said there were no dog biscuits so it was boring.


Friday, July 27, 2012

A-Binding We Will Go...

When I'm procrastinating on a task that I don't want to do, I usually justify the delay by doing something else. So while I was dragging my feet about making a binding and sewing it onto my Sister's Choice quilt, I decided to bang out three nice pillowcases.
These two are a matched pair and used up two yards of cream colored fabric that had gold metallic print on them. I don't like metallics and these were mistake purchases on the internet. I suppose I could have returned them, but I didn't. I like that they are Christmasy without actually using Christmas themed prints.

The third one is a pretty blue with a bit of olive greenery and buttercream yellow. I have already mailed it off to a friend who has been ill for a quick cheer-up present. One folded pillowcase fits very nicely into a manilla envelope and the postage was under $3.00. You couldn't buy a Hallmark brand card for that, or any type of flowers either.

As for my Sister's Choice, I broke down and faced the music. I had already auditioned the fabric that I wanted to use for the binding, a Civil War green stripe with tiny golden micro dots by Jo Morton of Andover. I got the 2 1/2" strips cut and joined together on the bias, and then ironed that one giant piece in half using some starch to "glue" the wrong sides together. Then I began machine stitching the binding onto the trimmed raw edges of the quilt.
You can just see the top of the open weave basket that holds the binding for me to keep it clean and untangled. Some people like to roll it up, but the basket works best for me.
There sure is a lot of quilt there to horse around!
I got it all sewn on, but I will admit it, I took a break when I was halfway around!
After I got it all applied onto the quilt, I pressed the binding over towards the backside of the quilt to be able to stitch it more easily. I don't use pins or even barrette clips to hold it into place, I just use my left hand to guide the next 3 or 4 inches into position as I sew.

It was such a gray day with showers that I sure did appreciate my Ott light!
Raven decided to sneak a little nap time in Puppy Dad's chair while he was down in the garden planting Swiss Chard and Bok Choy. He likes to plant those late in the season for the cooler temps so that they are less likely to bolt.


Tuesday, July 24, 2012

Windmills Of Your Mind

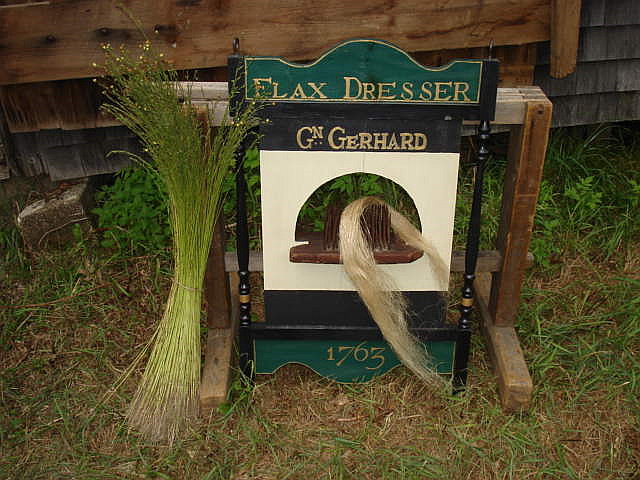
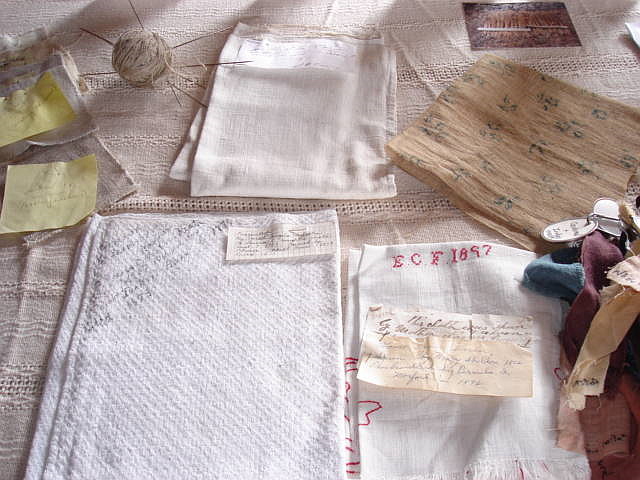
After a violent and blessedly air-clearing summer thunderstorm, my Civil War fabrics had gotten what I laughingly call, the final rinse! But the day turned breezy and they dried out just fine.
Yesterday I got Matthew's help to plant two baby hostas, one on either side of the shade bed where the astilbes are just finishing blooming. There are many mature hostas there already, but I needed to fill in the corners of the bed. He did a great job planting them! They sure do look puny next to the adult plants but they will grow.
If you look at about 4 O'clock in the above picture, maybe you can spot the baby hosta plant.

Thank goodness for that drenching rain we got today, everything had been so very dry.

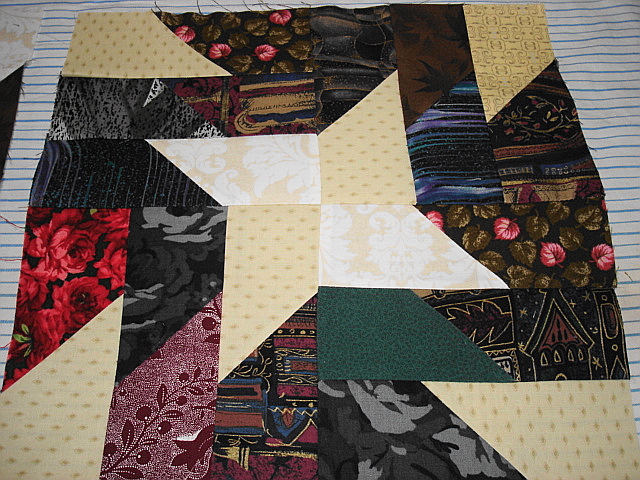
Today was also great fun because as I was stitching along by hand, hemming my Windmills Of Your Mind quilt, I was ready to take a break. Well, I thought, maybe I'll just rethread the needle once more...

 And suddenly I realized that that one last needleful gave me enough thread to finish it! I hadn't thought I was even close, so it snuck up on me! LOL! Now, honestly, how often does that happen? Usually you find you need to go a whole nuther long side. So here it is:
I need to measure it and do the label and hanging sleeve, but it is a nice couch-potato size.
This pattern was all done with Civil War reproduction fabrics in a limited palette of red, blue, brown, and creamy neutrals. The quilt center pattern was shown in a Youtube video http://www.youtube.com/watch?v=L5Ixvjje310&feature=relmfu by Jenny Doan of the Missouri Star Quilt Company. It was originally from the 3 Dudes Quilt Shop in Phoenix, Arizona. I added the flying geese border myself.
The backing of this quilt is an ecru flannel and I want you to see a few shots of the back to be able to appreciate Linda Monasky of the Bear Paw Gallery  http://www.thebearpawgallery.com/machine_quilting.html and her beautiful longarm quilting. She put a heart on each flying goose.

 The wide indigo borders have stars and loops which is my personal favorite.

And the windmills have interlocking circles on them. Linda did a magnificent job!
Here is a close up to show you the fabrics and the stars. Not all, but many of these Civil War reproduction fabrics came from the Sew Far Sew Good online quilt shop http://www.sewfarsewgoodquiltshop.com/ as well as the Golden Gese Qult Shop http://goldengesequilts.com/ right here in Concord, New Hampshire.


I love this quilt so much that I want to keep it in my family, but not at MY house! Raven's shedding black lab fur was very challenging to keep this backing clean. I think that this quilt will go to live at my sister Suzanne's house where I can visit it. She has no fur babies and she will treasure it.


Sunday, July 22, 2012

Quilty At Home Day

Today I finished up that little paper piecing block for the guild's raffle quilt next year. Here is the last sequence of steps to put on the final round, which was the triangle pieces, one at a time.
 First, flip it over, and fold the paper back exactly on the line.
 Then position the lip of the Add-A-Quarter ruler right on that folded paper,
 and trim it off for an exact 1/4" seam allowance to be perfectly ready to receive the edge of the next piece.
 Now flip it over again to the fabric side.
Now you can see from the above shots that each of the white batik strips have each been trimmed evenly to a quarter inch from the back. Now we add the triangles one at a time.
Now flip the whole business over again to show the printed lines. I have just stitched on the line, starting and stopping precisely, no going beyond!

Above, you see one side done and I have flipped it over to pin the next triangle into place. Then, I flip it over again and sew along the printed line again.
Here it is done:
I also worked some more on my hand hemming. It always takes longer than I think it should.

I had also used my big bathroom sink to prewash some browns in Orvus and hang them out. Boy, they sure did dry quickly in the afternoon's heat! By about 1:00 pm, I couldn't stand it anymore and closed up the house to put the AC on for poor Matthew. He worked so hard at the recycling center all day because they asked him to come in early this morning.
 My clothesline looks so innocent and idyllic in this picture! The truth is that its hot and the air was full of deer flies landing on me trying to bite. They are a bit smaller than a horsefly, but just as vicious. I hurried in!


Related Posts Plugin for WordPress, Blogger...